Database management
Account administrators can manage MySQL-databases through the 'MySQL Databases' menu on the 'Hosting' page of the Service Centre. You can see a complete overview of all databases in your hosting package, regardless of the domain name that is selected. You can also find the tab for the database backups here (you can read more about this in the backups manual). We will here just discuss creating and removing of new databases, logging in to the phpMyAdmin management environment and how to export or import a database backup.
The phpMyAdmin management environment has more advanced options. But to use those it is necessary to have thorough knowledge and experience of database management. The databases run in MariaDB, an open source branch of MySQL. For advice on technical questions or problems you can of course always mail our helpdesk.
Contents
Creating a database
Using the WordPress installer in our Service Centre automatically creates a database. If you install your own website software or if you want to manually install a CMS package such as WordPress, Joomla or Typo3, it is often necessary to create a database yourself. Here you find how to do this in a simple way.
Creating a '+ New database'
You can create a database by clicking the blue button '+ New database' above the overview of existing databases. A submenu then appears. In it you are asked to give a 'suffix', which means a label that the database name starts with and that you can use to distinguish the databases from each other. New databases by default get new login details for security reasons. They are distributed over several distinct database servers.
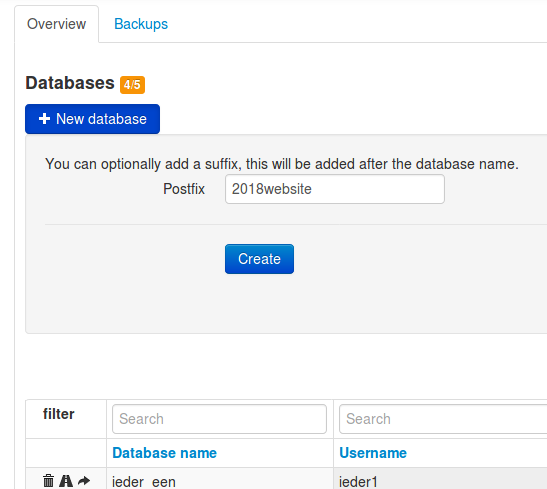 As soon as you click on the blue button '+ Nieuwe database' you can add a
label, or you can immediately click on 'Create'.
As soon as you click on the blue button '+ Nieuwe database' you can add a
label, or you can immediately click on 'Create'.
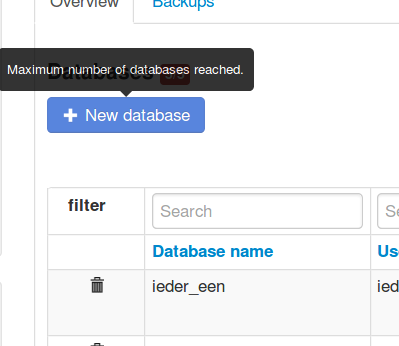
Maximum number of databases
There is a limit to the maximum amount of databases, depending on your hosting package, visible through a red counter/number button next to the page header 'Databases' directly above the blue button. Trying to create a new database will not work before old databases are removed. If you do not have the possibility to clear up space because all databases are in use you can contact the helpdesk to see what are the options.
Removing a database
Every type of hosting package has a maximum to the number of database. This is why it is worthwhile to maintain the database well and to immediately remove databases that are not in use any more.
Remove empty databases immediately
You can remove empty databases immediately by clicking on the rubbish bin icon. You then get a pop-up with the question 'Are you sure you want to remove this element?'. Click on OK.
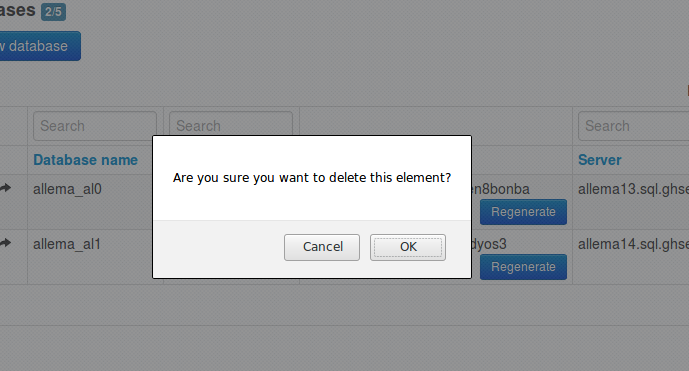
Upon deleting a database we always ask for a confirmation
Databases in which tables have already been created cannot be removed. The database should then be emptied first.
Read Emptying a database how this works.
phpMyAdmin
Logging in
Logging in is done by the blue button 'Log in' that can be found on the right-hand side of every database. By clicking on the Log in button a new window or tab is opened in your browser and you arrive at the phpMyAdmin environment.
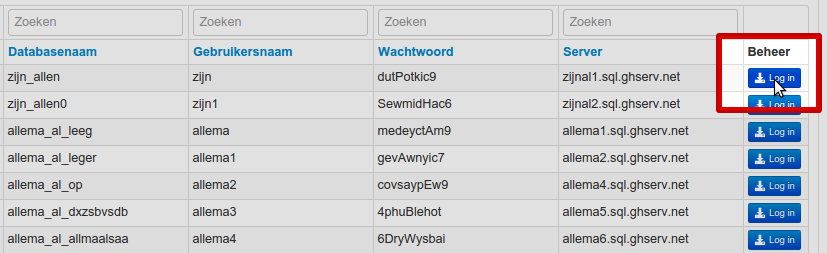
Via the blue button to the right of the database you can log in to the phpMyAdmin environment
Selecting the database
On the left-hand side you can select the database. Having done this, the database tables become visible and you can edit these.
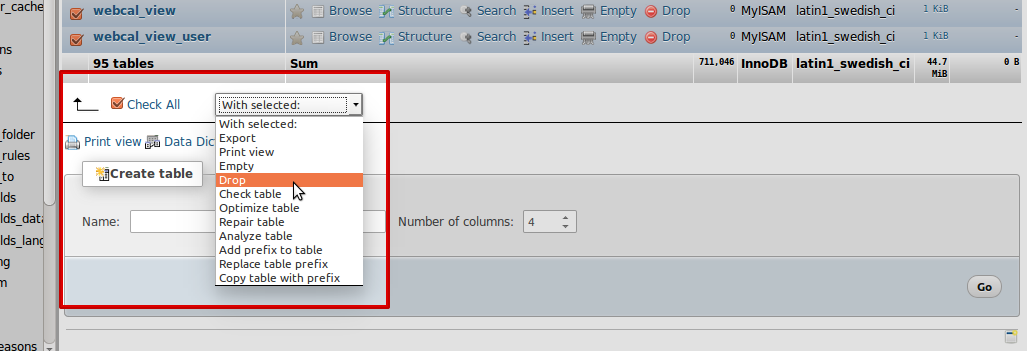
Selecting and removing tables ('drop')
Emptying a database
If you selected the correct database emptying the database takes a number of clicks.
- Select all tables by ticking the button 'Check all' below
- Then click to the right in the box with the text 'With selected:' to let a pop-up-menu appear.
- Select in the pop-up menu the function 'Drop'
-
You will see a red field with your created SQL query and the question 'Do you really want to execute the following query'
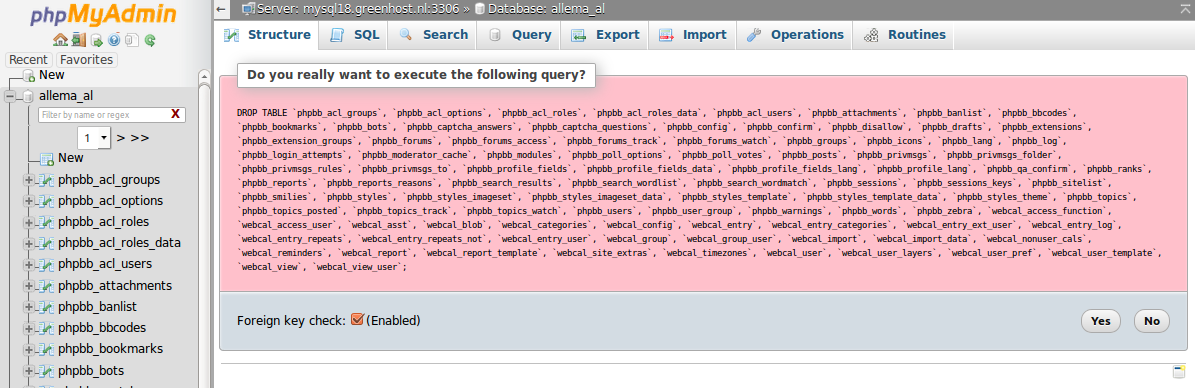
Confirm security question removing of all tables
- Click on 'Yes'
- The database is now empty. If your objective was to remove the database, you can return to the Service Centre and remove the database
Exporting a database
We encourage you to make backups of your databases on a regular basis. That is the only way for you to ensure you have the right databases on the unexpected moment that you need them. We run backups of all databases every day, but we do not guarantee the completeness or availability of them. Through phpMyAdmin you have a possibility to export and import backups of your databases. Below you can see how to export a database.
Exporting a database
You can create backups of databases on the tab 'Export'. You can choose to export the database 1 on 1, but particularly with larger databases it is wise to let phpMyAdmin compress the database tables before downloading them. This make a huge difference in size and download time.
Choose a compressed backup
We advise you while exporting to choose 'Export Method: Custom' and choose under 'Output:' 'Compression: gzipped'.
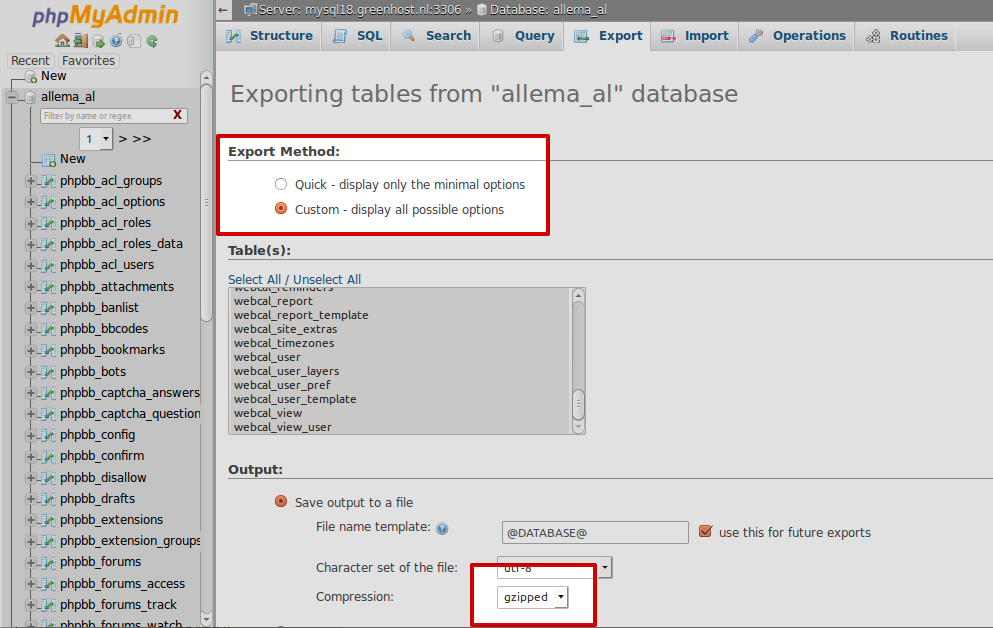
Before you are going to export the database we recommend you to enable compression
Save file on desired location
There are no other adjustments for a good backup. So right after choosing gzip as compression you can scroll down to start the download by clicking on the button 'Go'. You will then get a pop-up with the question whether you want to open the file immediately or rather save it. Choose saving of the backup. Do not close the browser before the backup has been downloaded completely.
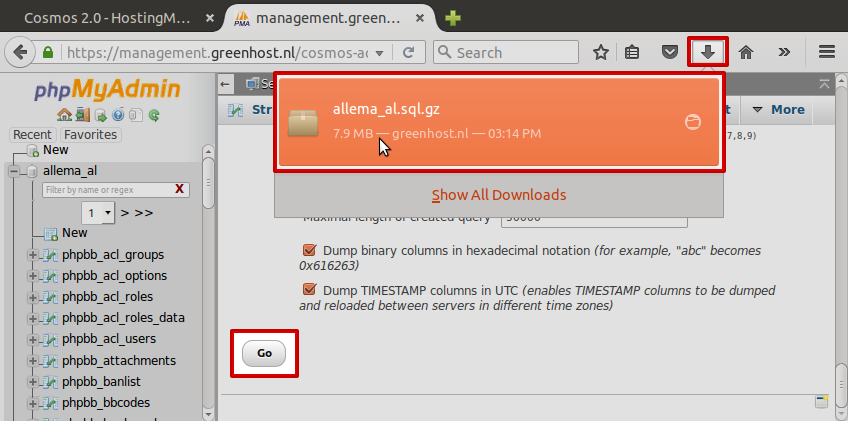
Do not close your browser as long as the download is busy! Sometimes this can take a very long time!
Importing a database
If you want to move a website to us, or if you need to solve a problem with your site, you can import an existing database via phpMyAdmin. Backups that you have downloaded via the Service Centre or phpMyAdmin are likely to be processed without problems. Should you have a deviating database this can lead to error messages and it is then necessary to adjust the configuration of your database import to the configuration of the database file. This can be done by following the list below.
Fast import of standard database backup
Under 'File to Import' you can select a database backup via the file browser. If you are importing a database that you have downloaded earlier via phpMyAdmin or the Service Centre, there is no need to configure anything else. A click on 'Go' will likely lead to a successful upload.
Custom import of a non-standard database backup
If an upload ends with an error message, you will need to work out what its cause is. If you are certain that the file is not corrupt, you have the following configuration options for importing the non-standard database backup:
- 'Character set of the file' under 'File to Import' : most databases make use of utf-8, you usually get a warning on the import if this is not so. Adjust the character set here to the right value
- 'Format' : the file type in which the non-compressed backup is delivered. Click in the box on 'SQL' to choose the right format via the drop-down
- 'SQL compatibility mode' under 'Format-Specific Options' : the database structure, such as MSSQL, ANSI or ORACLE
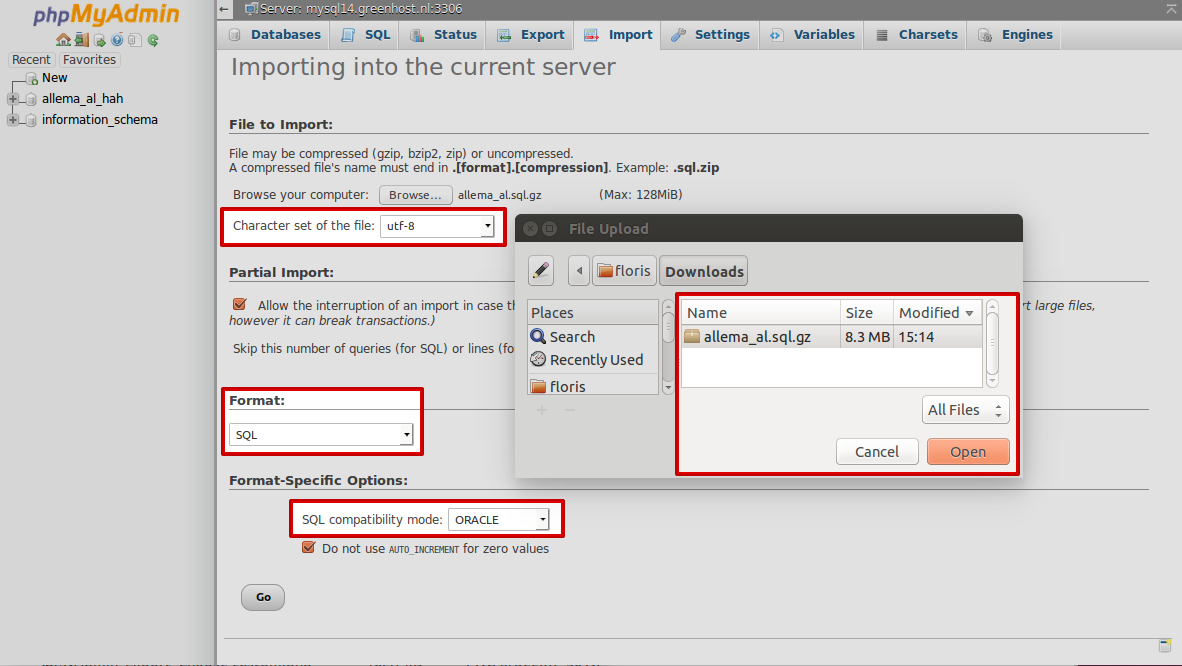
Importing a backup is done quickly, but it can be hard because of a non-matching format…